[et_pb_section fb_built=”1″ admin_label=”section” _builder_version=”3.0.47″][et_pb_row admin_label=”row” _builder_version=”3.0.48″ background_size=”initial” background_position=”top_left” background_repeat=”repeat”][et_pb_column type=”4_4″ _builder_version=”3.0.47″][et_pb_text admin_label=”Text” _builder_version=”3.21.1″ background_size=”initial” background_position=”top_left” background_repeat=”repeat”]
Are you thinking about starting a bullet journal?
You want to be more organized.
The post-it notes all over your desk are overwhelming.
Or your current planning system isn’t working anymore.
Your friend showed you her bullet journal and now you’re curious. You’d like to start one but you’re struggling with where to start.
What are the “bullets” in a bullet journal?
Is a bullet journal like a regular journal? Like a “Dear Diary” of sorts?
Do you have to be artistic and creative?
Luckily, you can use a bullet journal any way you would like!
You can set one up in a matter of minutes! And you don’t have to be creative AT ALL.
First things first…
What Is a Bullet Journal?
The bullet journal is a system that was developed by Ryder Carroll. It’s a way to track the past, plan for the future, and organize the present.
To get a basic understanding of his bullet journal system, check out his video here.
It’s one centralized location to store everything you need. Your calendar. Your to-do lists. Habit trackers. And every other list your heart could desire.
In a nutshell, it’s a choose-your-own-adventure, design-your-own-planner type of system.
The bullet journal is effective because it’s simple to use!
You can supercharge your productivity by logging notes throughout your day.
Every time a thought or reminder comes to mind, you can quickly jot it down so you won’t forget it.
(And by the way, according to bulletjournal.com, the bullets are “short-form sentences paired with symbols that visually categorize your entries into tasks, events or notes”.
You can design your bullet journal (or bujo for short) however you would like. And you can use any number of spreads, layouts, or trackers to fit your lifestyle.
Starting a bullet journal can seem totally overwhelming. Especially if you don’t know anything about them.
But in this post, I will break down each step with details, explanations, and pictures. I will walk you through all the supplies and the essential first pages. I will also include some extra pages you may want to add to your own journal.
So, let’s get down to business…
What kind of supplies do you need?
There are many different types of supplies you can use for your bullet journal. The type of supplies you will want mostly depends on what you plan to use your bujo for.
Do you plan to go all out and design gorgeous, creative, Pinterest-worthy spreads?
Do you want to practice your lettering and calligraphy?
Or maybe you want a functional planning system that will help you streamline your life?
Keep reading for the different supplies that will help you get started right away.
Some supplies are necessary, while others are just nice to have.
For notebooks, you have a couple of different options.
- Any basic notebook. (It doesn’t even have to be an empty notebook.)
- You could purchase an inexpensive, dotted grid notebook for under $10.
- Or you could go all out and purchase the favorite amongst bullet journal advocates. The Leuchtturm 1917. It includes a table of contents (otherwise known as index page) and 249 numbered pages, which makes it easy to find your collections.
What about writing instruments?
- Any ballpoint pen will do when you’re just starting out.
- Colored pens are great to have if you want to design artistic spreads and layouts. If so, you’ll want to choose one that won’t bleed through the paper.
- Paper Mate flair felt-tipped pens are a good choice for beginners. They come in vibrant colors, they are less prone to bleeding, and they have either 0.4mm or 0.7mm thickness which is perfect for drawing details and in small spaces.
- Pilot Frixion Pens are nice to have because they are erasable.
- A basic pencil is a necessity if you’re worried about making mistakes when drawing your weekly layout. I eventually got tired of continuously sharpening my pencil, so I invested in a nice mechanical pencil.
- For long paragraph entries, a fountain pen is your best bet. Fountain pens are much lighter and allow for an easier writing experience. If you want to improve your handwriting, go with a fountain pen. It will help you write more slowly and clearly. The Pilot Metropolitan is an affordable option.
- Another great tool to use for everyday writing is a sharpie fine pen. Don’t confuse it with the permanent markers – they won’t bleed through your paper. But they’re great for fine, bold, black lines.
- My favorite to use in my bullet journal is the line of Zebra Midliner Highlighters. They work as a highlighter because you can mark over your writing without the fear of covering it up. But they aren’t as bright as traditional highlighters, and the colors are more vivid. They’re dual-ended, with a chisel tip for highlighting, and a bullet tip for fine underlining.
- If you want to work on your lettering techniques, you might want to use a Tombow Fudenosuke Brush Pen. They are generally considered some of the best brush pens available. You can purchase a 2 pack with a soft and hard tip for about $6.
Supplies That Are Nice to Have
-
- A ruler will help you design beautiful layouts and spreads like you see all over Pinterest. I picked up a $1 ruler in the school supplies section of Walmart.
- A compass is a great tool to help you draw perfect circles when you want to get super creative with your bullet journal trackers.
- A protractor is used for measuring angles.
- Washi tape is a great, inexpensive way to spruce up your bullet journal pages. If you don’t have one artistic bone in your body, use a ruler to design simple, minimalistic layouts, then add a pop of color by lining the page with washi tape.
- Post-it notes are another great tool to use for keeping all your thoughts and ideas organized.{Quick Tip}
Keep a stash of post-it notes in your car so you can jot down any ideas that pop in your head while you’re driving. Then store them in your bullet journal for later.
When you sit down with your journal later that night, you will be able to see a collection of all of your thoughts from throughout the day. You can either leave the post-it notes in your bullet journal, or you can add the notes individually to your daily log. Either way is more efficient than leaving post-it notes scattered throughout your house and car. - Just like with planners, stickers are a great way to decorate your journal and express your creativity.
For many people, the use of stickers increases productivity. They flag certain tasks, due dates, and bills. They also keep everything neat and organized. - Another way to mark your pages is by using Avery Ultra Tabs. They are writable and can easily be erased. They’re extremely helpful for bullet journals because once you’ve been using your journal for a while, you will have a set of pages you frequently turn to, and constantly searching the index can be time-consuming.
- Binder clips help keep your journal open to the page you are currently using.
- When using a bullet journal, there are bound to be mistakes. It’s inevitable. Fortunately, white out now comes in an easy to use correction tape.
- Permanent adhesive is great to use if you would rather use printable bullet journal pages. You can print them out and glue them to your own bullet journal. It’s a fantastic way to save time.
Okay, now that we’ve got the supplies out of the way, it’s time to get started setting up your bullet journal.
#1 – Set Up Your First Pages
a. Index
The index is like a table of contents.
You will constantly be adding pages to your bullet journal. Some pages you will use frequently, and others you will only use occasionally.
The index will give you an idea of where everything is located so you can quickly find the page that you need.
You want your index to be the very first page in your journal so it’s easy to find right off the bat.
To start your index, first, you’ll want to number a certain amount of pages.
Since you’ll only be using the first few pages at first, you don’t need to number every single page.
Number about 10 pages as you proceed through your journal.
Then design your index.
You can choose a simple design, or you can get a little more creative.
{Quick Tip}
Use the first single page right when you open your journal. Since it’s not a full page, it’s a great way to make use of a half-page that would otherwise go unused.
Here are a few examples of indexes to help you get started.
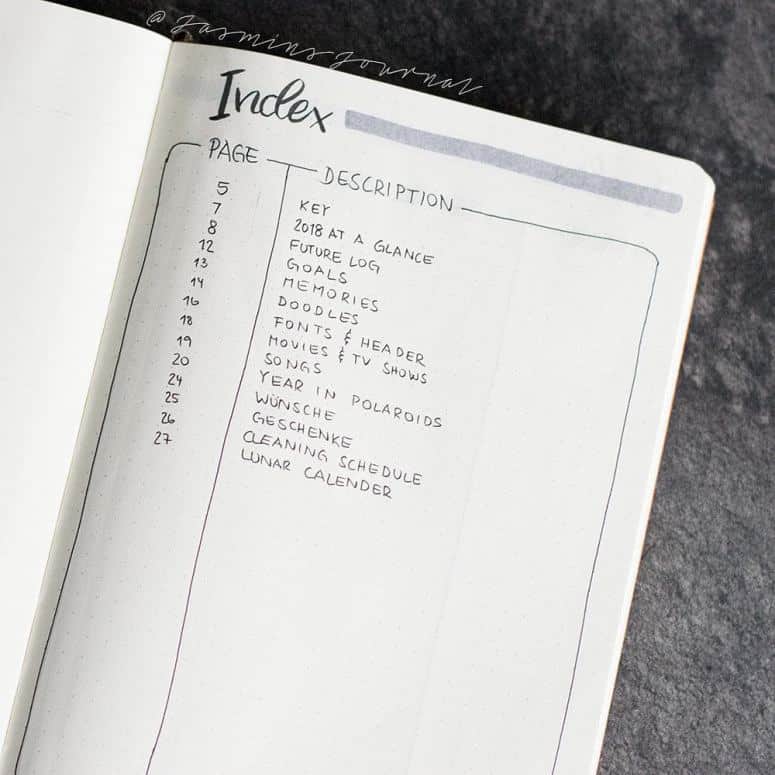
@jasminsjournal
As you can see, you want to leave space at the bottom so you have room to continuously add pages as you go.
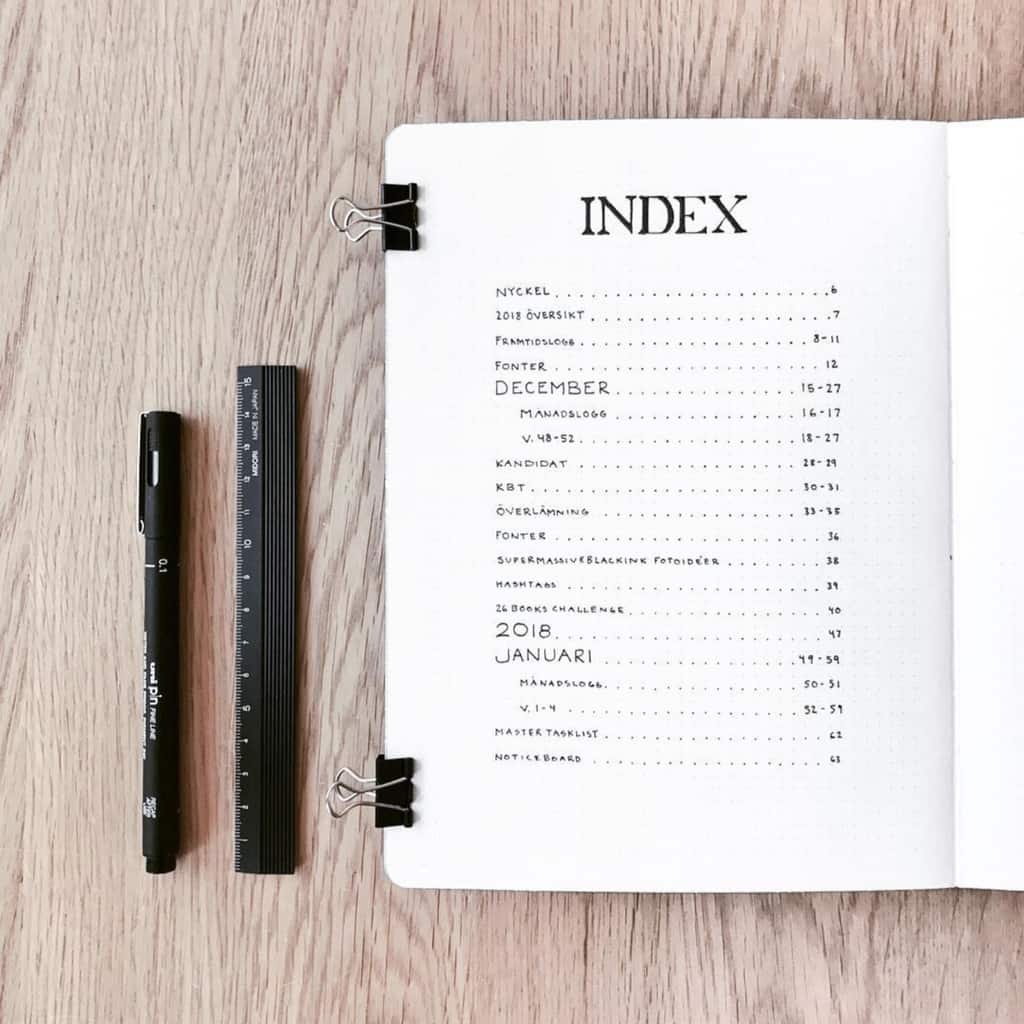
@petitemelanie
This index is neat and organized. I’m sure the user is able to find exactly what she needs right away.
b. Key and/or Legend
The next page should be your key (otherwise known as a legend). A key is a way to keep track of all of the symbols you use. And symbols are a visual demonstration to classify your journal entries.
To set up your key, first, decide what symbols you want to use.
Some suggestions you could use are:
- A square for a task
- A circle for an event
- A triangle to denote an appointment
- An exclamation point to mark something as urgent
- A question mark for research
- An asterisk for reminders
- A dollar sign to remind you of something you need to buy
- A check-mark to state when something has been completed
- An X to mark when something has been canceled
There are even symbols to use when something has been migrated or re-scheduled. To mark something as migrated, I use a rounded arrow. If a task has been re-scheduled, I use a straight arrow.
(Migrating a task simply means that you’re moving it forward to the next day, the next week, or the next month. You could also migrate a task into a list, or collection.)
Next, decide if you want to color-code your entries.
If you decide to use a color code, go ahead and add it to your key. You’ll want to have a way to reference what each color signifies.
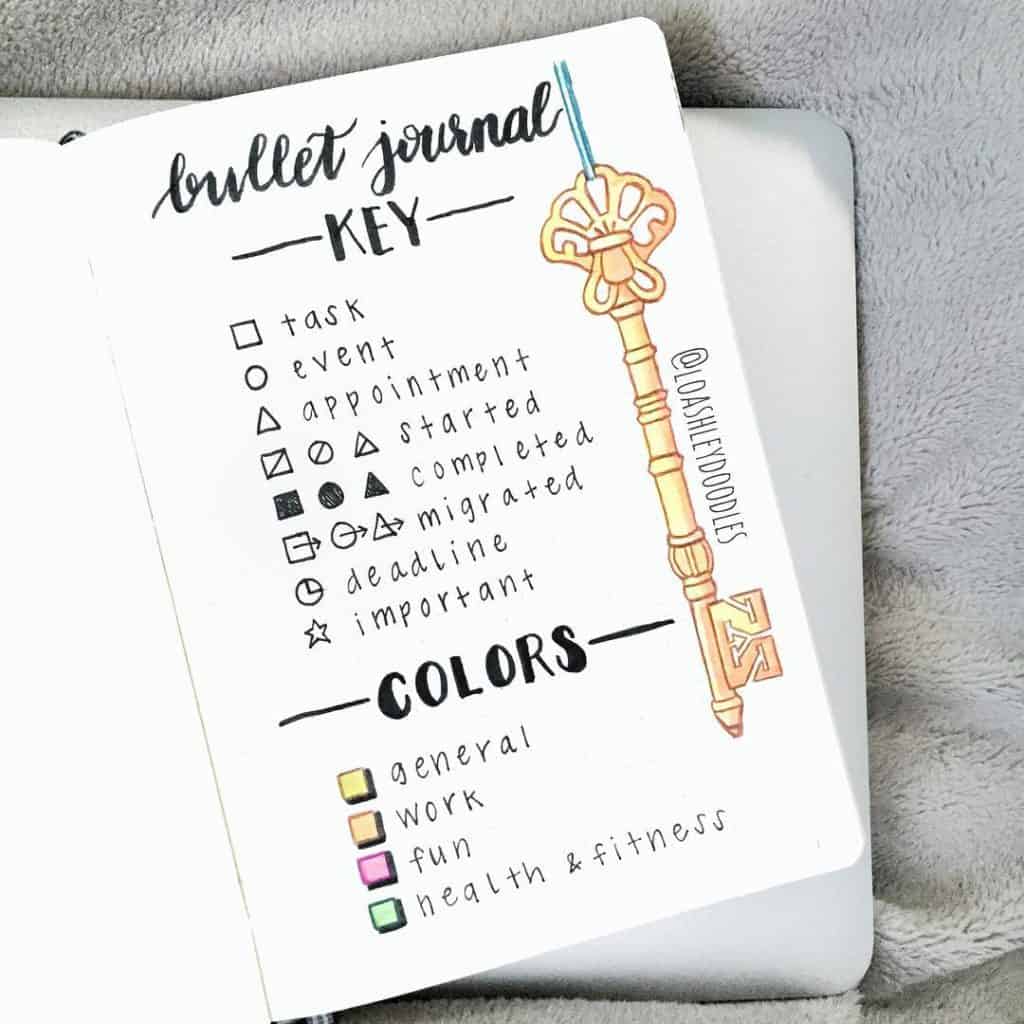
@loashleydoodles
Here is an example of a simple bujo key, along with a color code.
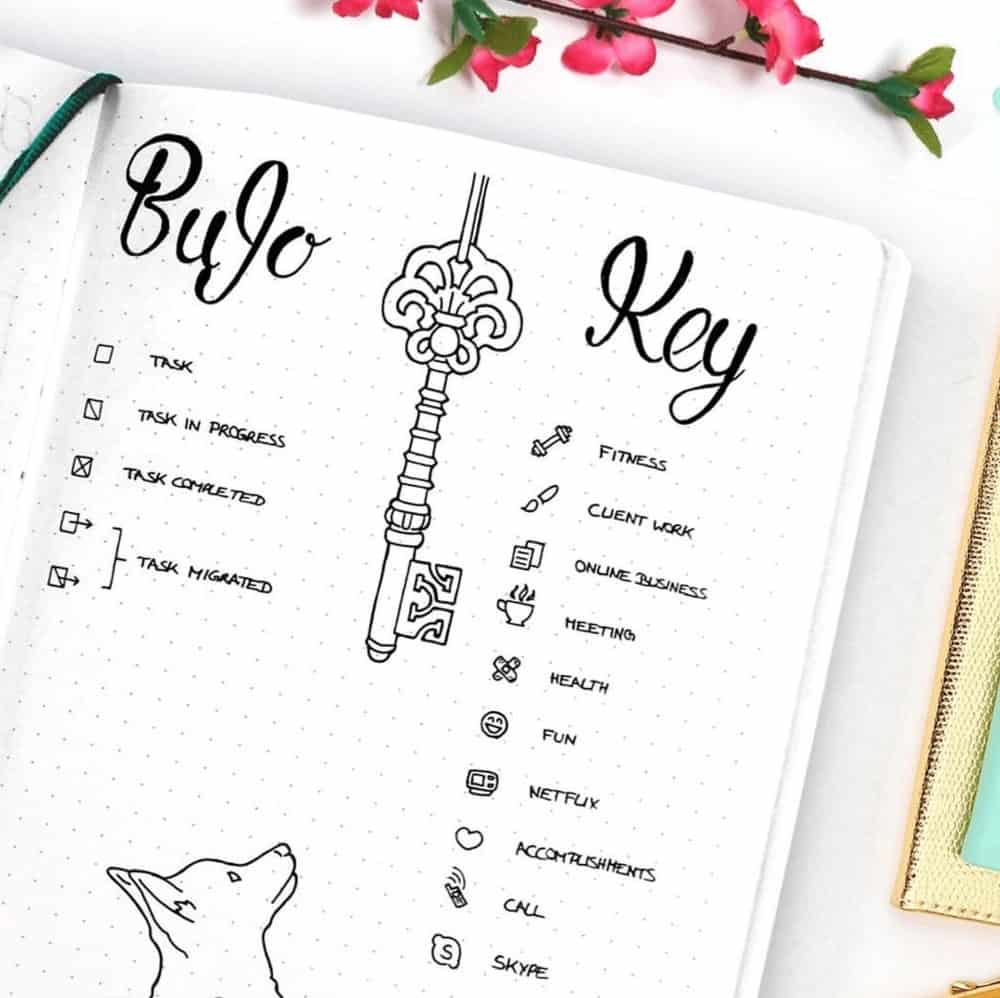
@wundertastichdesign
The creator of this bullet journal key uses her bujo for her online business. She also keeps track of her fitness goals, Netflix shows, as well as fun and entertainment.
c. Future Log
The beauty of the bullet journal is that it allows you to organize the current month however you choose.
But when it comes to your monthly layouts, you don’t want to design them all ahead of time.
You want them to be spaced out well enough so you have enough room for your daily spreads. But you also don’t want to skip too many pages.
So, if you don’t have any pre-planned monthly spreads, you’ll need a way to record future dates so you can access them when planning the coming month.
That’s the great part of a future log!
You can plan for the future as far out as you would like. But ideally, you’ll probably want to plan about 3 months in advance.
Start your future log on the next blank page after your Key.
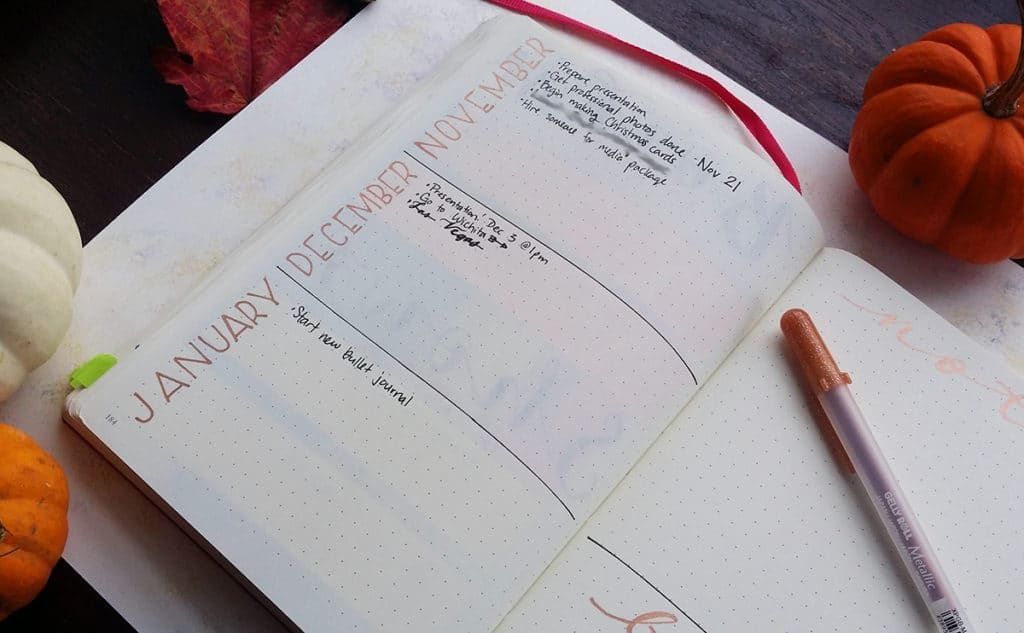
@littlecoffeefox
Here is a minimalist future log that covers 3 months. As you can see, you do not have to spend all evening designing an artistic layout. It can be as simple as you want.
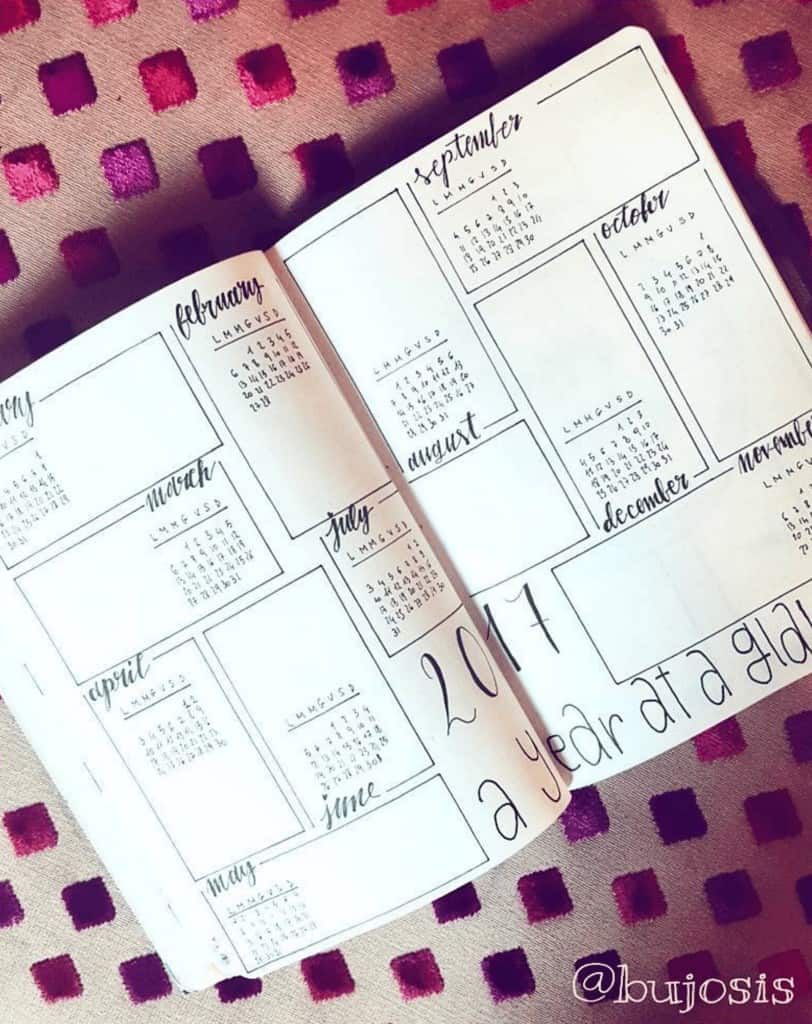
@bujosis
This is a fantastic future log that covers the entire year. Each month has its own separate box. If you will be going through more than one bullet journal a year, I would suggest using a 3-month future log instead.
You can design a 3-month future log on one page by making your boxes just a little bigger.
And here is an example of Ryder Carroll’s future log (the inventor of the bullet journal). He plans for 6 months in advance.
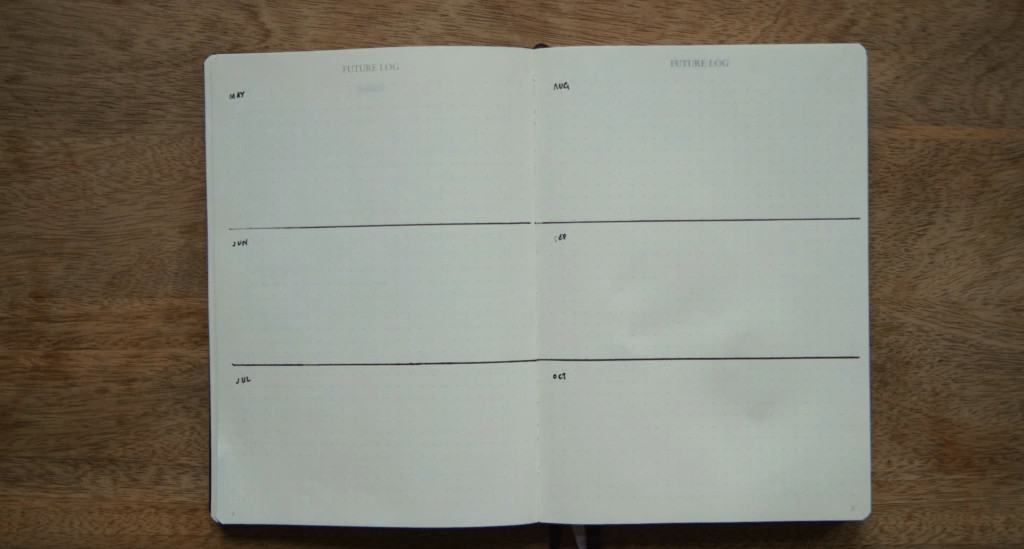
@rydercarroll
Simple, yet extremely effective.
When you first set up your future log, make sure you reference your current planning system so you can add all of the important dates and appointments to the relevant months.
2. Set Up Your Spreads
So what is the difference between a ‘spread’ and a ‘layout’?
A spread is any kind of design that takes up both pages when your journal is open. The two pages that face each other are called a spread.
And a layout is just another term for a spread. I use both interchangeably. Ryder Carroll uses the term “spread”.
a. Monthly Spreads
Your monthly spread is a way to outline the current month. It’s an overview of everything you have going on.
And as with everything else, you can design it however you would like.
– To get started with your first monthly spread, design a simple calendar, and list every important event under the corresponding date.
Or you could number the days of the month down the side of the page with the event next to the date. This is how Ryder Carroll uses his monthly spread.
– Next, add any tasks or projects that you plan to work on throughout the month.
{Quick Tip}
Use your monthly spread to showcase your goals for the month!
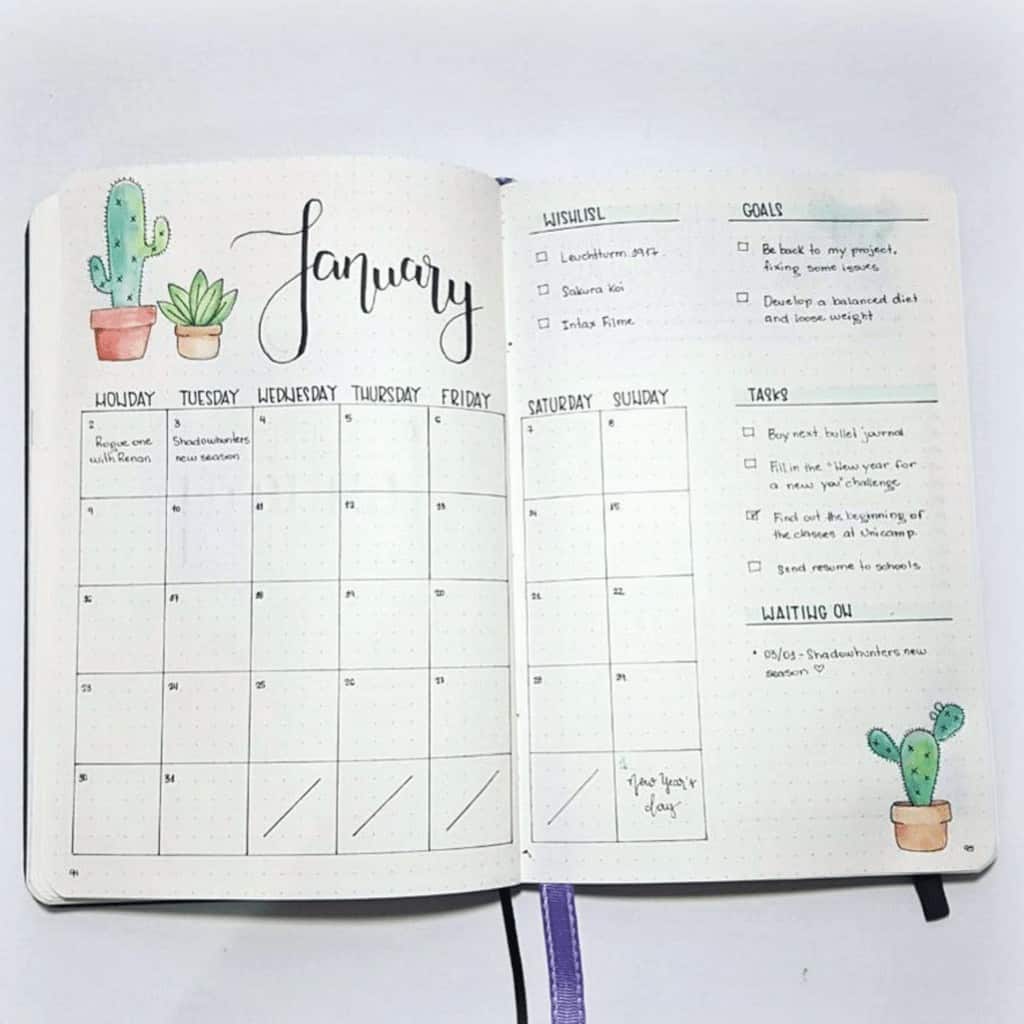
@bahcampos
Here is a minimalist monthly spread. It is pretty and functional.
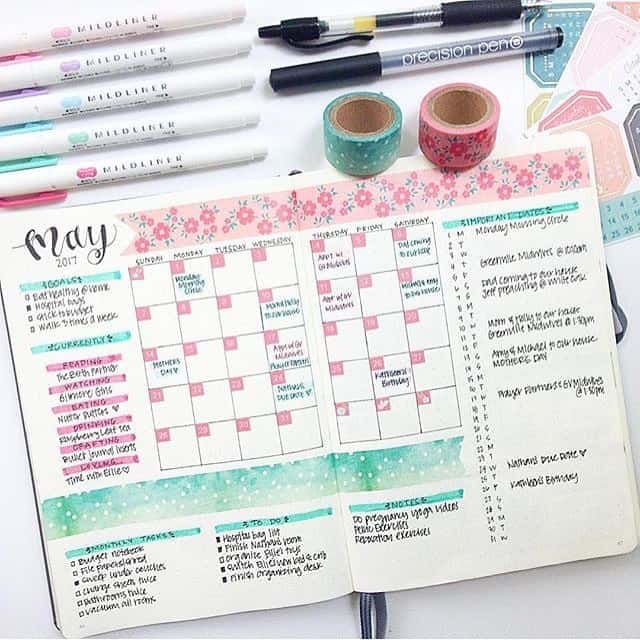
@simplifybujo
This monthly spread is very visually appealing. It makes use of every inch available. The creator has a section for monthly tasks, to-dos, notes, and important dates.
When you create your monthly log, it’s a good idea to add an important dates list. It will be a huge help every week when it comes time to design your weekly spread…
b. Weekly Spread
Although the weekly spread is not a part of the original Bullet Journal Method, it’s extremely useful if you have a very busy life full of extracurriculars, different work schedules or multiple appointments for you or your children.
In other words, if your weekly schedule tends to change drastically from one week to the next, a weekly spread will be a huge help in managing your life.
Aside from keeping track of your schedule, you can also use your weekly spread to keep track of your tasks and to-dos. Scheduling your to-do list along with the rest of your week is another way to streamline your life. When you check your schedule, you will know exactly what you need to do on a daily basis.
To set up your weekly spread, first, you’ll want to design it to your liking. Here are a few ideas for inspiration.
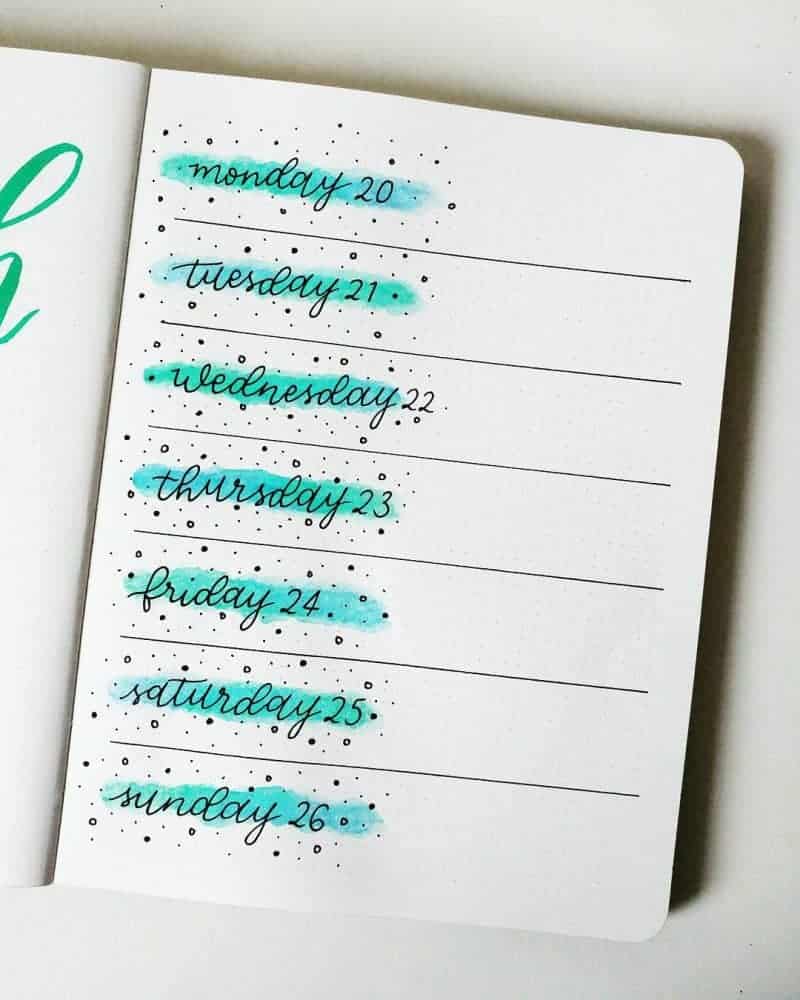
unknown
This weekly layout uses only one page. But the pop of color is absolutely beautiful!
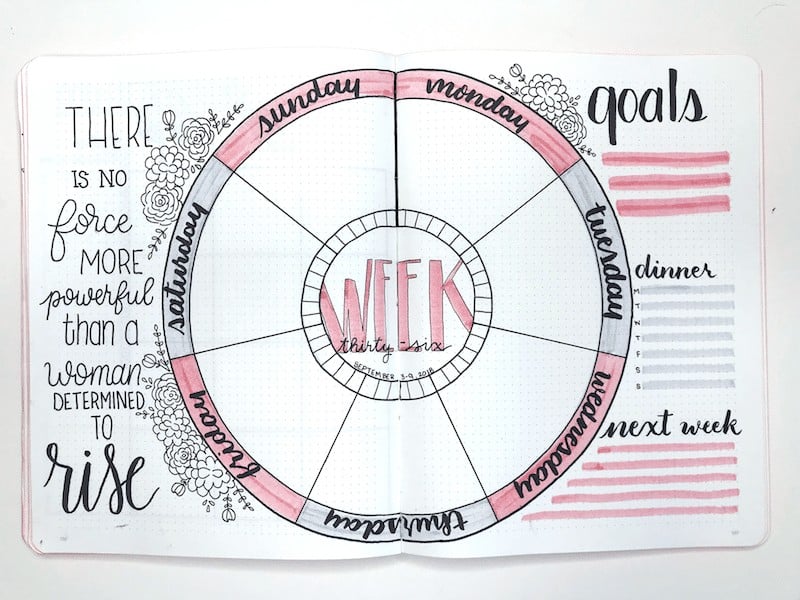
@thepetiteplanner
This weekly spread is quite unique. It uses a circle graph to show the days of the week.
A weekly layout is one of the best ways to streamline your life. Start by sitting down every Sunday to plan your week.
After you design your layout, flip to your monthly spread and migrate all of the important dates for the current week.
Then, every night, you can sit down with your journal and know exactly what you have planned for the following day.
Which brings us to the next set of pages you should have.
3. Daily Log
Now we’re getting into the nitty-gritty of the bullet journal.
Daily logs are a way to log all of the important information that comes up on a daily basis.
You can use it as a daily schedule, a to-do list, a journal, or any combination of the three.
Or you can choose to skip the current day and just pick up where you left off tomorrow.
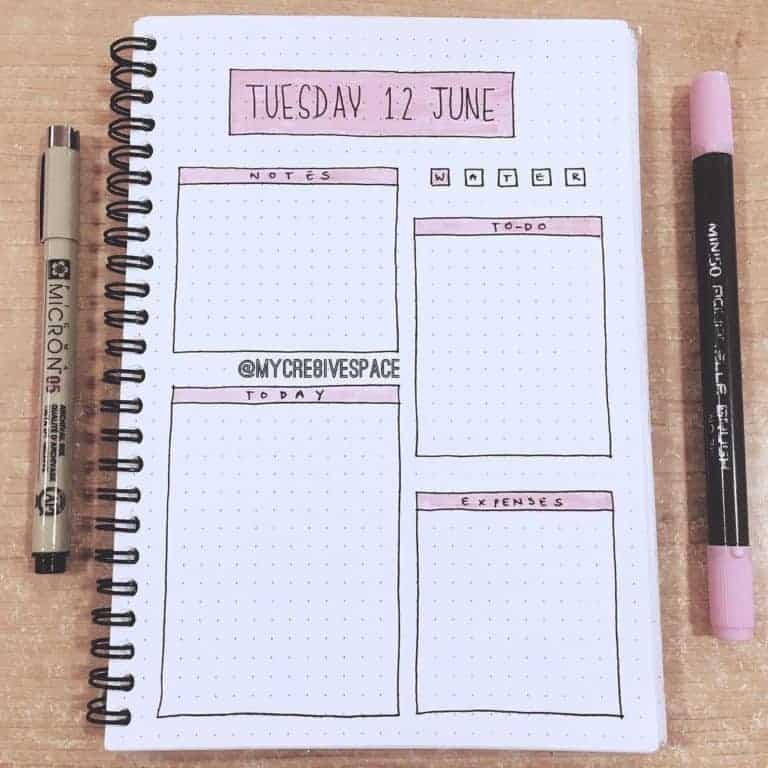
@mycre8ivespace
I love the look of this daily! The creator makes use of the whole page, which leaves her plenty of room for to-dos, notes, and expenses.
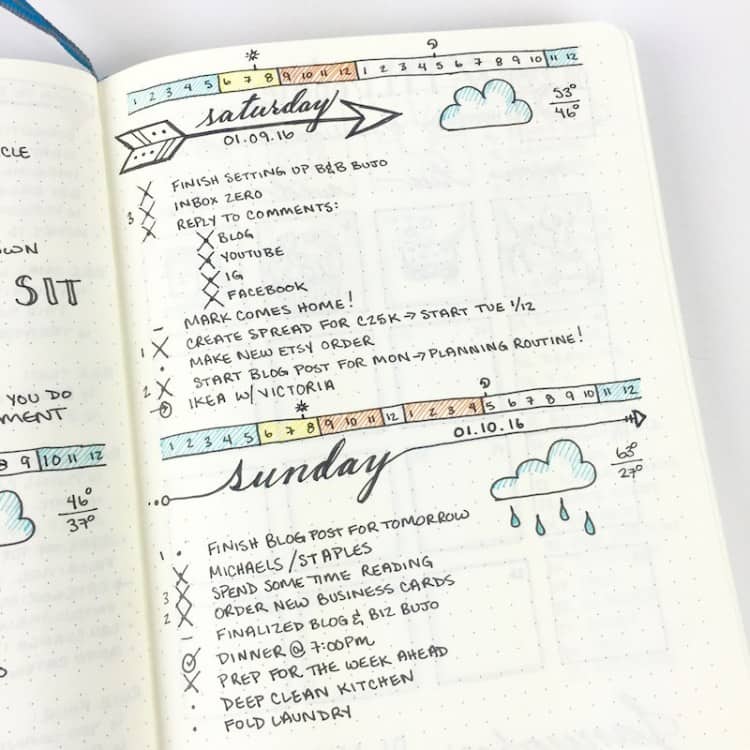
@bohoberry
The creator of this daily log uses a half-page at a time. I love how she incorporates the weather into her planning. It makes it easy to plan your day, especially if you’re not a news-watcher.
Collections
Collections are the most unique aspect of bullet journaling.
Essentially, they are a way to organize related tasks, notes, and thoughts.
To get started with your first collection, you’ll want to decide on a topic.
For example, if you found that you were frequently including things to buy in your daily log, you could start a collection titled “Things To Buy”. Then you would migrate all of the related notes and lists into that collection.
Or you can simply start a collection for any reason you would like!
- Sleep Trackers
- Habit Trackers
- Recipe Banks
- Gratitude Logs
- Mood Trackers
- Reading Lists
- Places To Visit
Take a look at these bullet journal collections for inspiration.
If you need some more ideas, grab a copy of the 75 bullet journal ideas.
@sharonajournals
Tracking your sleep in your bullet journal is a great idea! It makes it easy to see how consistent you are with your sleep times. And you can use the info to help decipher your daily mood.
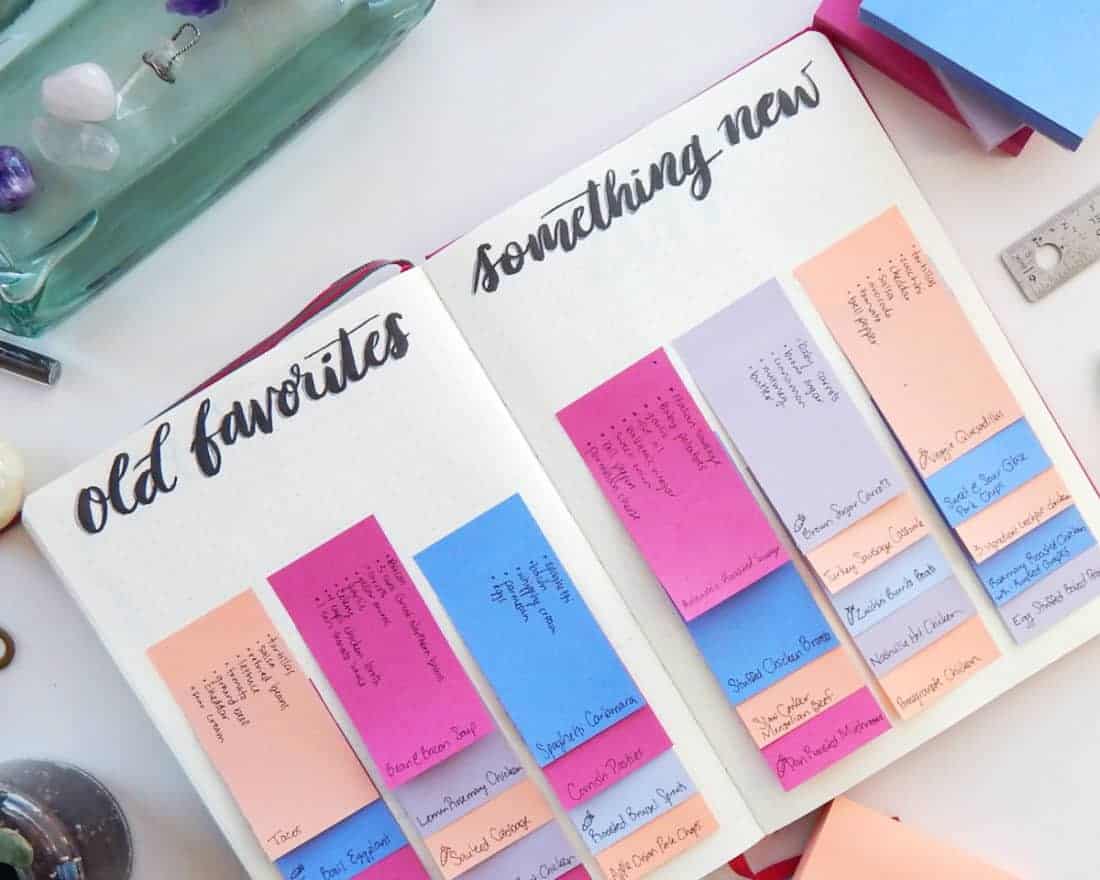
@littlecoffeefox
This bujo collection is so inspiring! It’s a recipe bank made out of post-it notes. On the end of each note is the name of the recipe, with the ingredients listed towards the middle. They are layered on top of each other to make room for multiple recipes, and each color signifies a different type of meal. It makes meal planning SO much easier when you can see all of your recipes at once.
@lolasbujo
Here’s another example of a gorgeous sleep tracker.
[/et_pb_text][/et_pb_column][/et_pb_row][/et_pb_section]
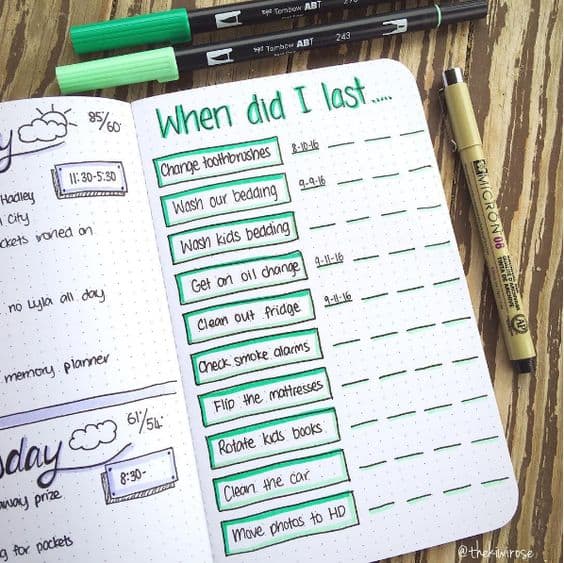
@thekiwirose
This collection is so neat! We plan to keep certain areas of our home updated, but life gets in the way all too often. If you have a tendency to forget things, design a “When Did I Last” collection in your bullet journal so you can stay on top of your smoke detector batteries, oil changes, and toothbrushes.
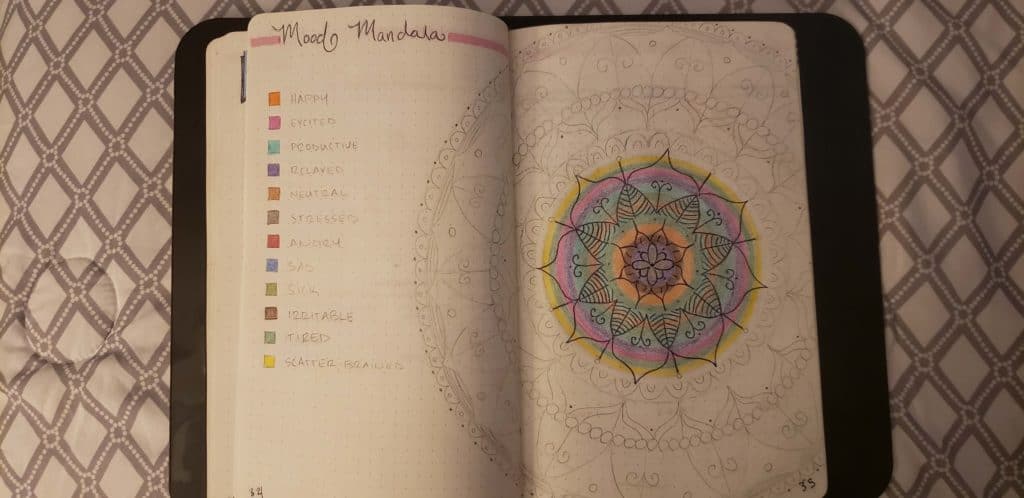
@The Maximizing Momma
Here is a copy of the mood mandala I created in my own bullet journal. I love being able to see how my moods change throughout the month!
Your Turn
If you want to streamline your life and get more organized, a bullet journal is the best way to go.
It might seem really confusing. But once you get started, you’ll realize its actually pretty simple.
Remember, all you need is a notebook and a pen to get started. All of the other supplies are just fluff. Once you’ve been using your journal for a few weeks, you can start adding more supplies to your arsenal as you go.
Here are the first few steps to get your bullet journal up and running right away:
- Start with your index page. Number about 10 pages at a time as you progress through your journal.
- Add your key. Use the basics at first – a square for a task, a circle for an event, and a triangle for an appointment. You could also add an asterisk for a reminder, an arrow when your task has been migrated, and a check-mark when it has been completed.
- Create a future log for approximately 3 months from now. Use your current planning system to add all of your scheduled events and appointments to your future log.
- Then design your first monthly spread. (If it’s the middle of the month, skip the monthly layout and start with your weekly layout.)
- The last step is to plan the next day. Sit down before you go to bed tonight and decide on everything you want to take care of tomorrow. Add everything to the next blank page after your monthly/weekly spread. You can add your schedule, your appointments, even your shopping list.
Is there something holding you back from starting your own bullet journal?
Maybe it seems too time-consuming? Or you want it to be colorful and artistic, but you’re worried about mistakes?
Let me know in the comments below!




Leave a Reply
You must be logged in to post a comment.